!Let Us HELP YOU!
We have a lot of curated content on this blog.
Take this simple 20 second Quiz to Help You
Find The Exact Content You Are Looking For!
In The Mix demonstrates a fast, practical workflow for using the new Fl Studio Deverb to reduce baked‑in reverb from vocal samples, dialogue and voiceovers. This article summarises the video, expands on the techniques shown, and gives clear step‑by‑step guidance so readers can replicate the results in their own projects.
The content here is curared with the help of this video FL Studio’s New Deverb – How To Remove Vocal Reverb please check out their channel here too.
Table of Contents
- Why Fl Studio Deverb matters
- Quick overview: what the tool does
- Step‑by‑step: remove reverb with best results
- Practical tips and common pitfalls
- When Deverb is challenged: dialogue and worst‑case rooms
- Combining Fl Studio Deverb with other tools
- Recommended workflow checklist
- Comparison: Fl Studio Deverb vs RX10
- Additional resources
- FAQ
- Final thoughts
Why Fl Studio Deverb matters
Removing unwanted reverb from a recording used to mean re‑recording or using expensive specialised tools. The new Fl Studio Deverb provides a convenient way to attenuate room tails and baked‑in ambience right inside FL Studio. It’s especially useful when working with sample packs, remix contest stems, or podcast dialogue where a dry take isn’t available.
Quick overview: what the tool does
Fl Studio Deverb analyses an audio file, estimates the reverberant energy and allows you to blend between the original and a processed, de‑reverbed version. It’s not magic — it won’t perfectly reconstruct a studio dry vocal from a heavy hall recording — but in many real‑world cases it reduces reverb enough that the part can sit in a modern mix or be re‑processed with a new reverb.
Step‑by‑step: remove reverb with best results
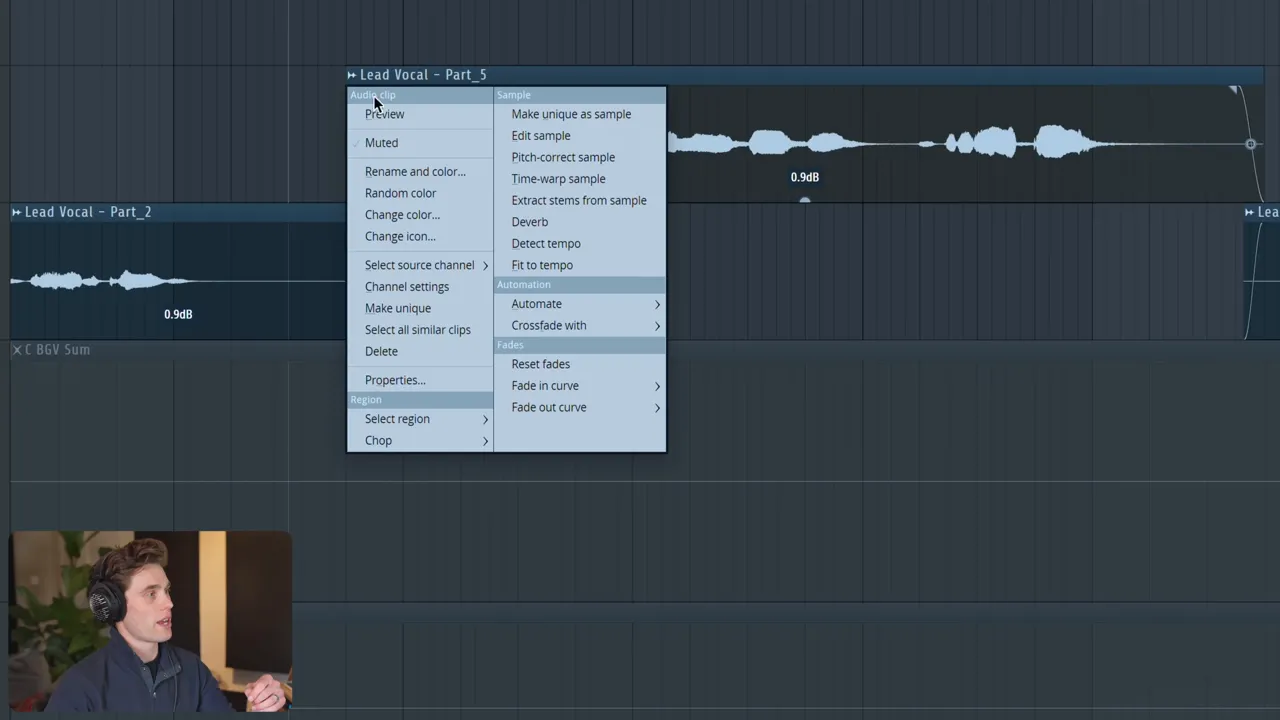
- Open the sample — In the Channel Sampler use the small wave icon, then choose Dverb. If the audio is in Edison, open the spanner and select Dverb there.
- Choose a profile — For vocals select Voice. The voice profile tends to give better results than a general preset for speech and sung material.
- Process a short section first — The operation is CPU‑intensive. Make the sample unique and run the deverb on a short region to audition results quickly.
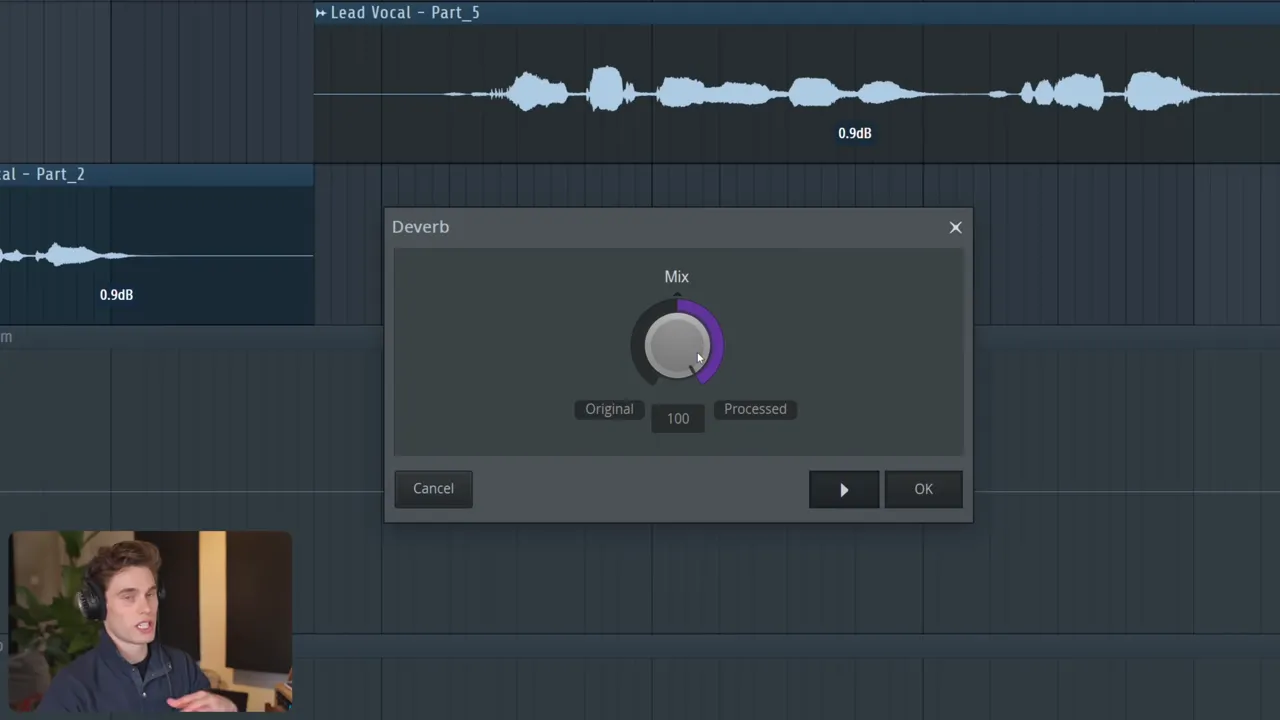
- Use the blend control — Don’t leave the output at 100% processed. Fl Studio Deverb includes a mix/blend slider that lets you interpolate between the dry and fully processed versions. For most samples the sweet spot is low — start at 10–20% processed and increase only if needed.
- Compare in context — Play the processed vocal with the rest of the mix. If needed, add a new plate or room reverb and blend it to taste.
Practical tips and common pitfalls
- A little goes a long way. The creator recommends about 10–20% processed for many vocals. Higher values (50–100%) often sound brittle, robotic or “choppy.”
- Run short passes first. Processing long files takes time; preview on a representative phrase or verse.
- Watch for artifacts. Aggressive reduction can remove the natural character of the voice and introduce combing or robotic timbres.
- Follow with gentle dynamics. A light compressor helps smooth the result — Kotelnikov (free) is recommended for gentle ratios and transparent control.
- Re‑apply a tasteful reverb. Once the long tails are controlled, you can add a new plate or short room reverb to glue the vocal into the production.
When Deverb is challenged: dialogue and worst‑case rooms
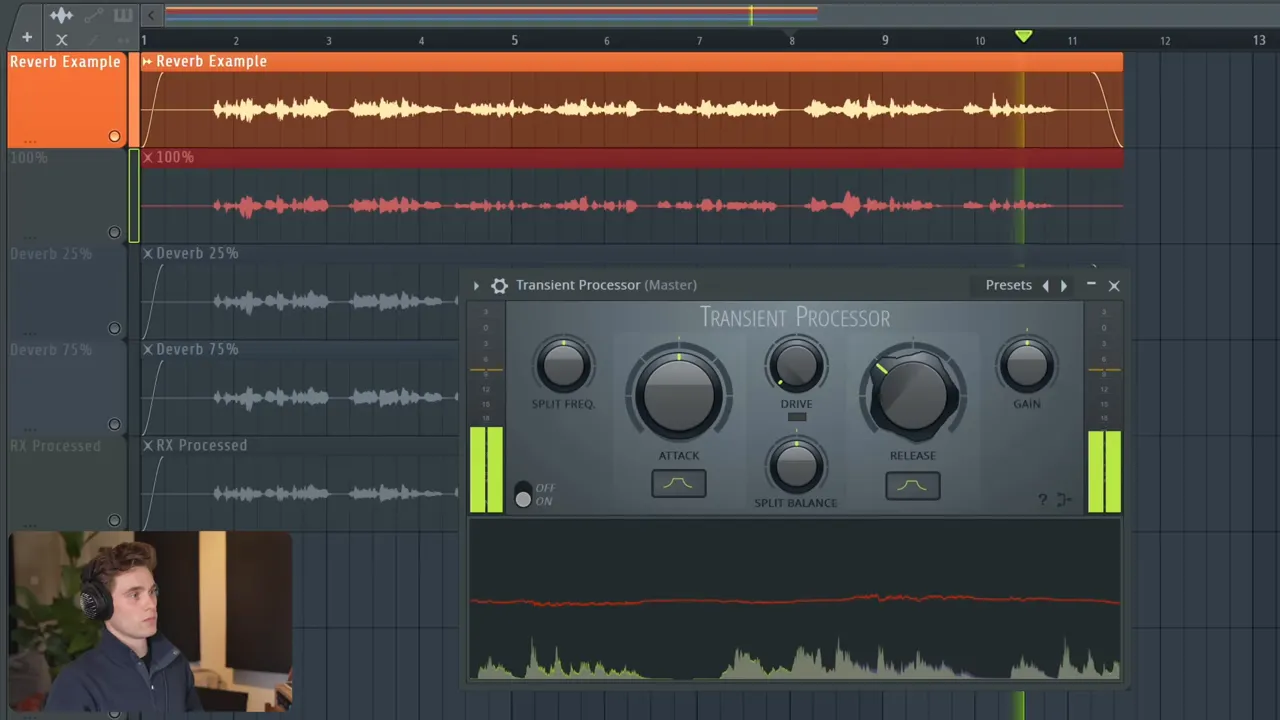
Deverb works well on many samples but struggles with extreme recordings — for example, speech recorded on a poor mic in a highly reverberant room where echoes fold back into the mic. In these scenarios the creator tested Fl Studio Deverb at 25%, 75% and 100% and found that the lower reductions provided the most intelligibility and the most natural timbre. Pushing to 75–100% often made the voice sound synthetic.
“I’d consider this a worst‑case scenario… when you push it a bit further, even casual listeners would start thinking you sound a bit like a robot.”
Combining Fl Studio Deverb with other tools
For tricky files, pair Fl Studio Deverb with other methods:
- Transient processing (All Plugins Edition). The transient processor can clamp reverb tails by tightening release times — useful as a follow‑up when Deverb alone isn’t enough. Pulling the release down “clamps” tails and can produce a natural result when used sparingly.
- RX‑style processing. iZotope RX (dialogue D‑Reverb and noise reduction) provides deeper control and algorithm options. In tests, Fl Studio Deverb at low percentages was often faster and simpler, delivering comparable results without the steeper learning curve.
- Compression and smoothing. Use a gentle compressor after de‑reverb to reduce perceived choppiness and restore a stable vocal presence.
Recommended workflow checklist
- Make the sample unique and process a short section first.
- Open Dverb → choose Voice profile.
- Run processing and use the blend/mix slider — aim for 10–25% as a starting point.
- If needed, follow with transient processing (All Plugins Edition) to tighten tails.
- Apply light compression (Kotelnikov suggested) to smooth artifacts.
- Add a new, controlled reverb (plate/short room) for aesthetic character.
Comparison: Fl Studio Deverb vs RX10
RX10 offers deep control and specialised dialogue algorithms, but it requires more skill and time. Fl Studio Deverb is integrated, quick to try, and especially effective when used conservatively. For many producers the speed and simplicity make Fl Studio Deverb the first port of call; if deeper restoration is needed, go to RX or a dedicated restoration suite.
Additional resources
Related reading from the site collection:
- Curated tips and tutorials: https://howtomakebeatsblog.com/
- Learn creative vocal effects and processing techniques: https://howtomakebeatsblog.com/trippie-redd-vocal-effect-tutorial/
FAQ
How much Fl Studio Deverb should I use?
Start low. The creator finds 10–20% works for most vocals. For dialogue in a reverberant room, 25% is a good starting point. Avoid 100% unless you are prepared to accept heavy artifacts.
Can Fl Studio Deverb remove all reverb?
No. Deverb reduces reverberant energy and can make a part usable, but it won’t perfectly recreate a studio dry take if the original is extremely reverberant. Use it to reduce tails and then re‑dress the performance with a controlled reverb if required.
Where is Dverb located in FL Studio?
Open the sample’s small wave icon and select Dverb. In Edison, open the spanner (tool) menu and choose Dverb.
Is Fl Studio Deverb CPU heavy?
Yes — processing can take a while on long files. Run short test passes, and be aware the current implementation can’t be minimised to run in the background (a desirable future improvement).
Do I need the All Plugins Edition?
No, Deverb is available in the FL update, but transient processor and some extra tools are part of the All Plugins Edition. The transient processor is a helpful additional tool to reduce remaining reverb tails.
Final thoughts
Fl Studio Deverb is a welcome, practical tool for rescuing reverby samples and improving dialogue recordings. The best results come from conservative use: blend a small amount of processing, follow up with transient control and light compression, then reintroduce a tasteful reverb for musicality. For many producers and editors, Deverb will save time and expand the kinds of source material that can be used.
WEBSITE RESOURCES FOR MUSICIANS

